Totally Screwed Machine Shop
Back to MAIN, Heli Stuff
Raptor .90 electric conversion
We have been helping a fellow flier convert a Raptor .90 into an electric for use in a scale BO-105 heli. There is no reason this same conversion cannot be used in any scale heli using the R90 mechanics. The heli build is http://rc.runryder.com/helicopter/t674467p9/?p=5808091#RR and the actual conversion starts around page 9.
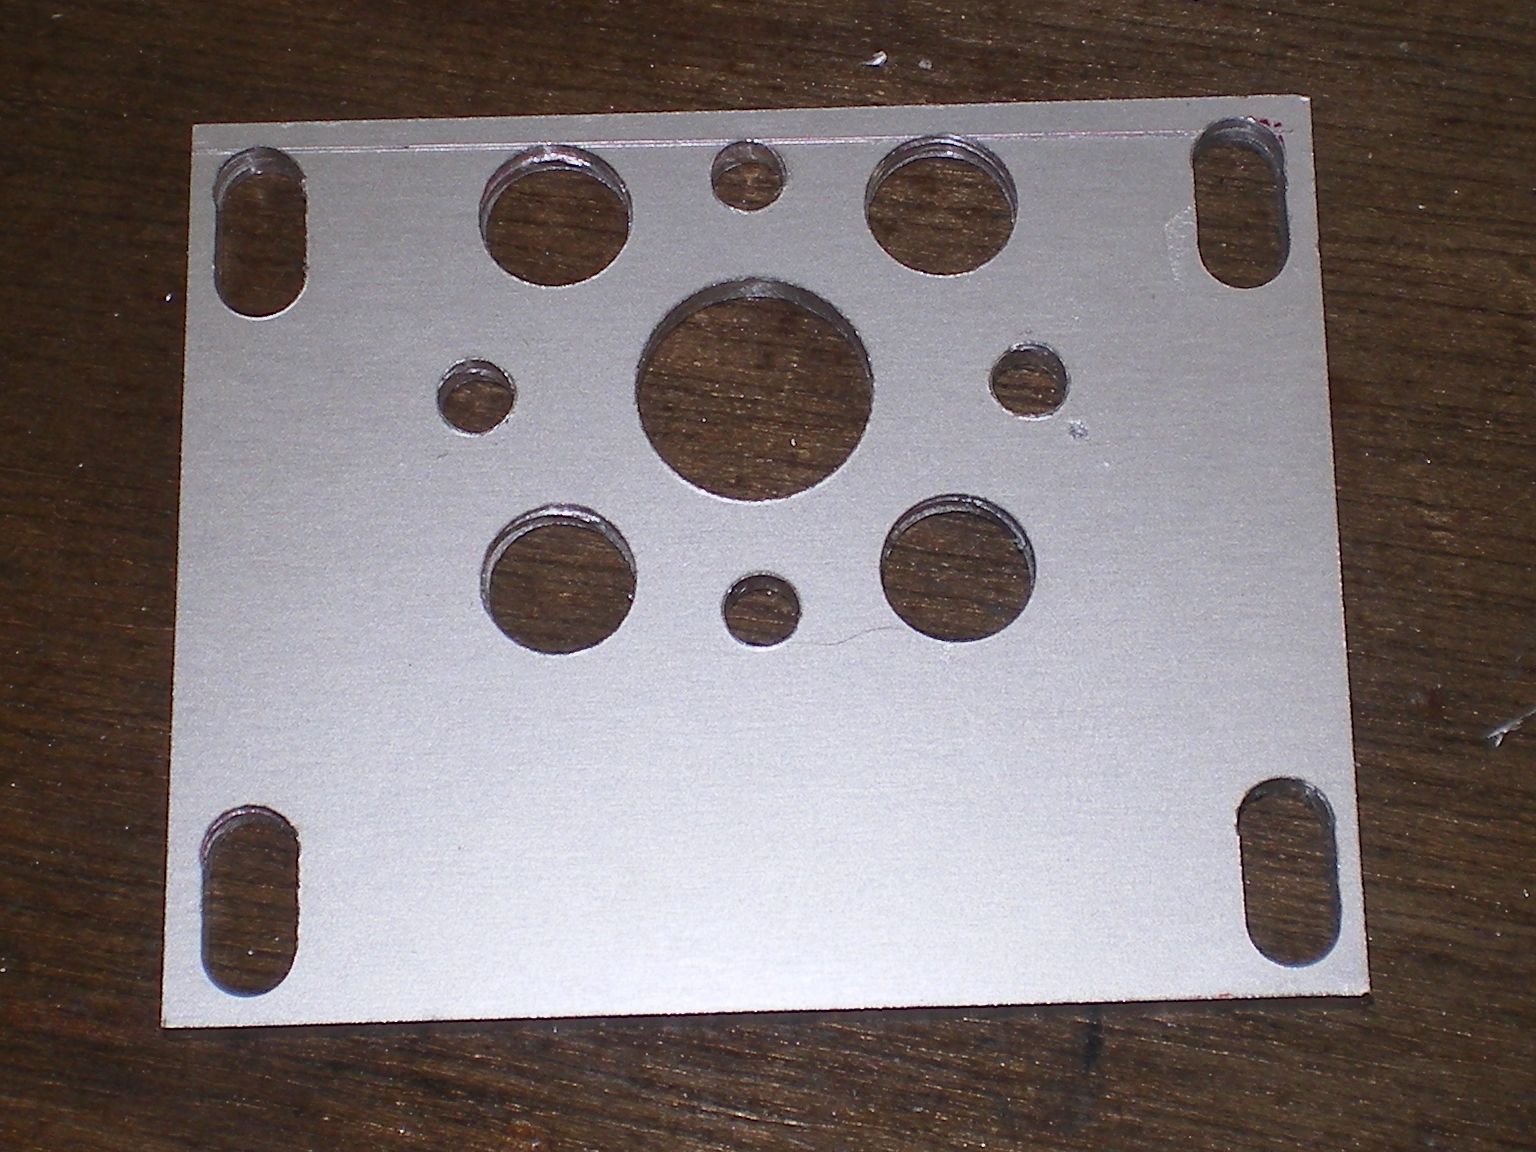
First item is a simple plate that is bolted onto the fan shroud between the frames.
This plate is what the electric motor will mount on. The slots allow adjustment for pinion size changes. Accommodations are made for motors with 25mm or 30mm spacing of 4mm bolts. The aluminum material helps conduct heat away from the electric motor while the larger holes allow airflow through the motor. Pictured is the second prototype. We moved the motor mounting holes fwd off center so it won't be so hard against the shroud mount. There are 2 types of fan shrouds and this plate will fit both types.

One other requirement is a coupler to connect the motor shaft to the R90's starter shaft to make use of the extra bearings. You may also desire to have a 19x6x5 bearing to replace the Raptor's pinion bearing. We used Silver Steel in the coupling pictured above.

Just under the motor is another desirable modification. A simple spacer which allows the removal of the large chunk of aluminium used for engine mounting.
Those of you who made it over from RR have seen those pictures, sorry, but we had to use Barry's pictures since I don't have an R90 to play with and make our own.
This conversion has been completed and successfully flight tested.
In the past we were agreeable to making these but we are no longer going to bother with it for several reasons that We don't really want to discuss. This would be the excuse I am using for slow response (or no response) in regards to answering emails/requests.
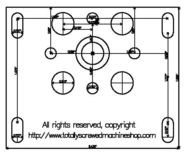
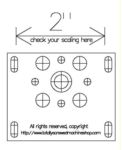
We have decided instead to post the drawings. 1st you'll need to dl the dimensional drawing and print it to fit the page to help with drill sizes etc. Then DL the template and print original size. Cut it out and Gluestick it on your plate, then use a center punch to mark the holes for drilling. This is a simple way that is accurate enough and likely a lot faster than using a milling machine like us.
We make no warrantee express or implied.
Instructions:
There is not likely to be much more than the instructions that came with your fus. So I'll just give some hints.
There is likely some red layout dye on your kit. Many solvents will remove it. There is an edge that is red and has 3 scratches. That would be the edge that we measured from....Sooo that woud be the edge you'd hold against the frame for marking the holes.
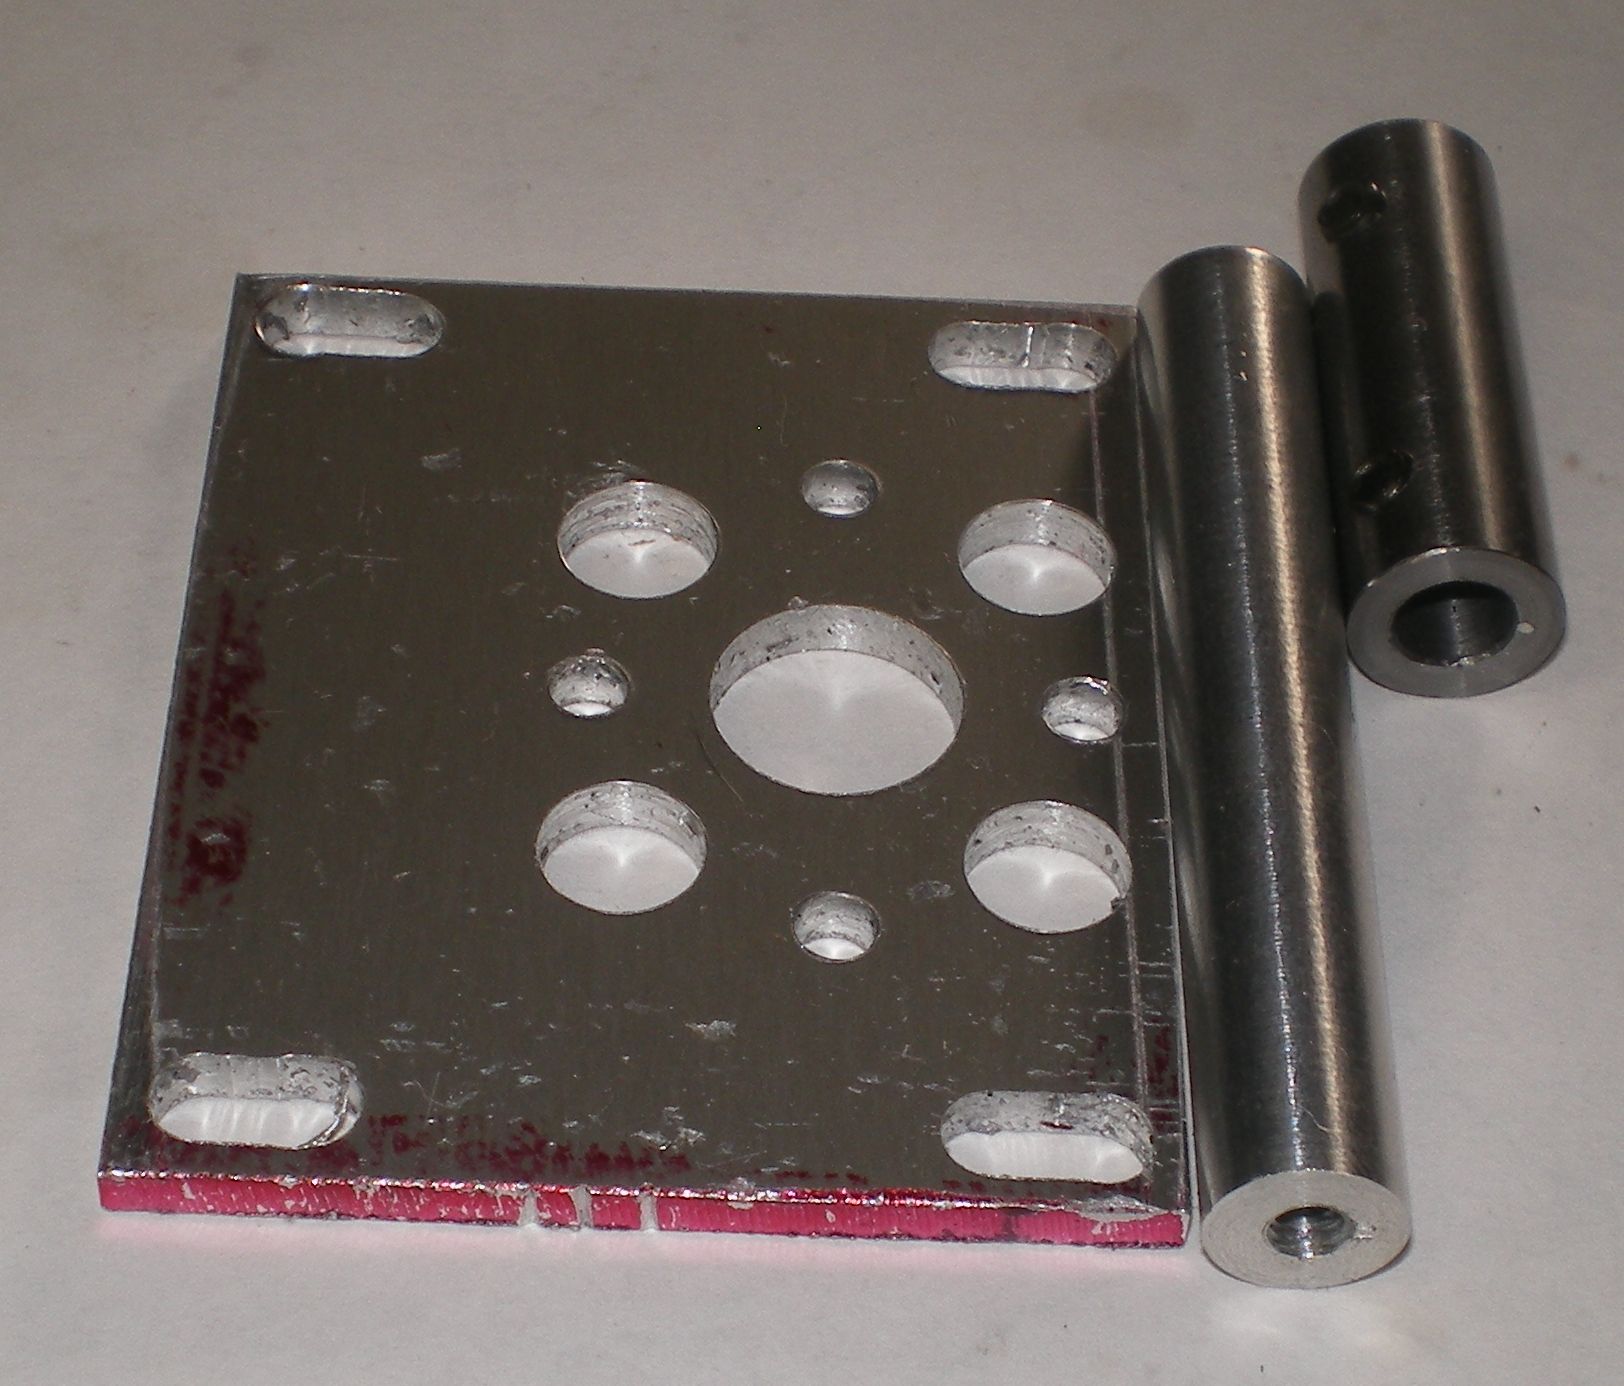
Above is the full kit.
7/23/12 5:56
Back to MAIN, Heli Stuff